How to Set-Up Allocations & Product Bundles
Note: In NetSuite, if you have Product Mapping Rules or Bundles configured in CereTax, do not populate default psCode with a value.
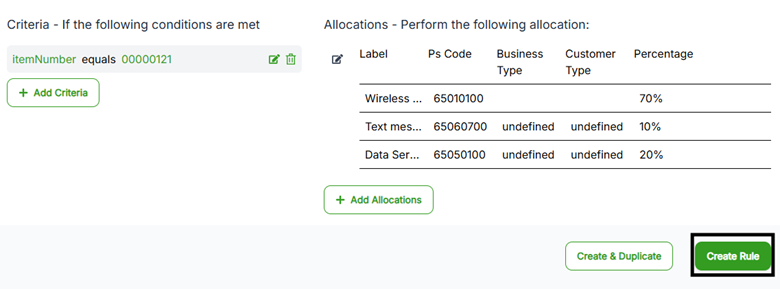
An allocation and product bundle rule enables you to allocate a single line item to multiple PS Codes based on the different products and services the product bundle includes. For example, if you sell a wireless package that includes text, talk, and voice, an allocation rule can be set-up to ensure the bundle is taxed based on the percentage each component represents.
Create the Rule Type
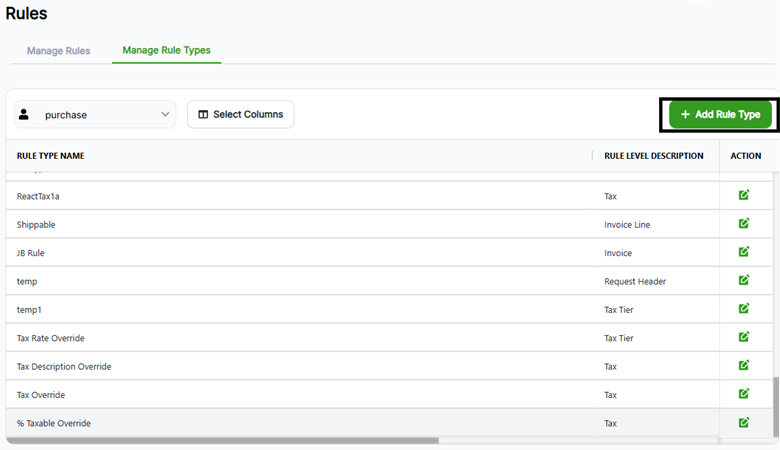
1. Once logged into CereTax, navigate to Rules >Manage Rule Types
2. Select the Profile that this Rule Type is for. If there is only one Profile, this should already be displayed as the default
3. Click + Add Rule Type
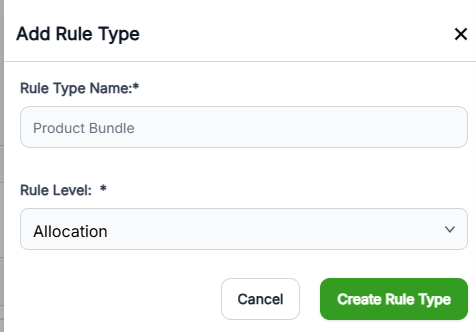
4. Enter a Rule Type Name, like "Product Bundle".
5. Select the Rule Level. For this type of configuration, the Rule Level will be Allocation.
6. Click Create Rule Type.
Set the Criteria and Action Elements
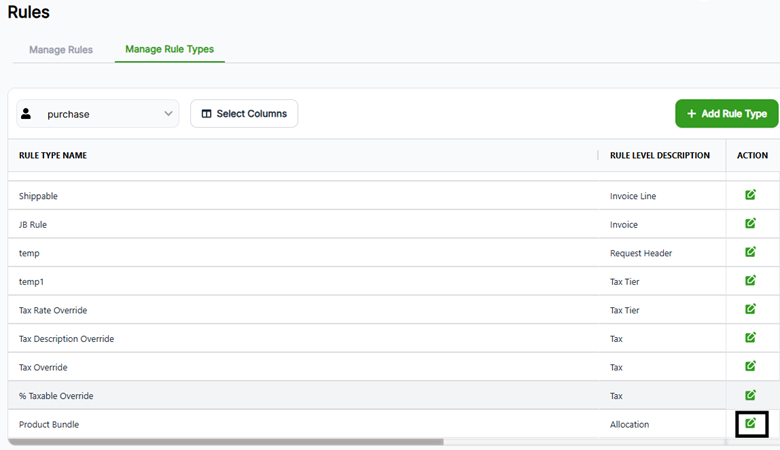
1. Click the Edit icon next to the newly created Rule Type
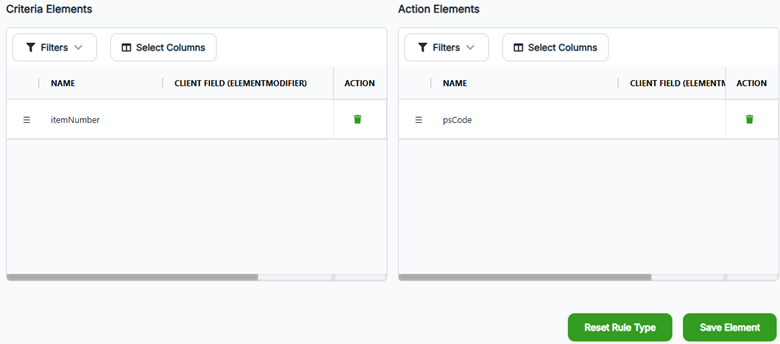
2. Set the Criteria element as Item Number by dragging the itemNumber field from the Available Element table to the Criteria Element Table.
3. Set the Action elements by dragging the psCode field from the Available Element table to the Action Element Table.
4. Click Save Elements.
Create the Rule
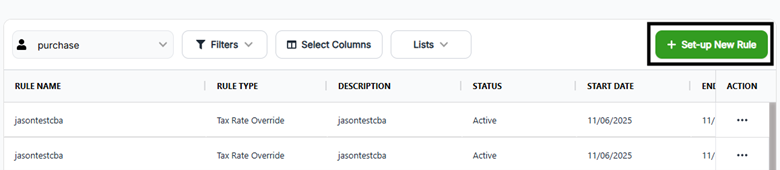
1. Navigate to Rules > Manage Rules
2. Select the Profile that this Rule Type is for. If there is only one Profile, this should already be displayed as the default.
3. Click Set-up New Rule
4. Fill out the following fields on the Create Rule form:
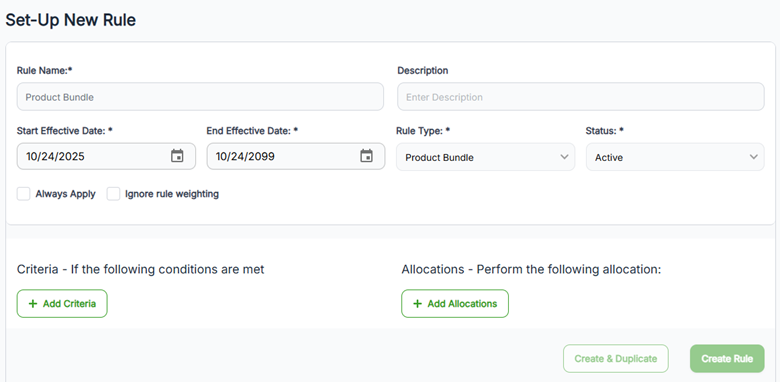
Add the Criteria Element(s)
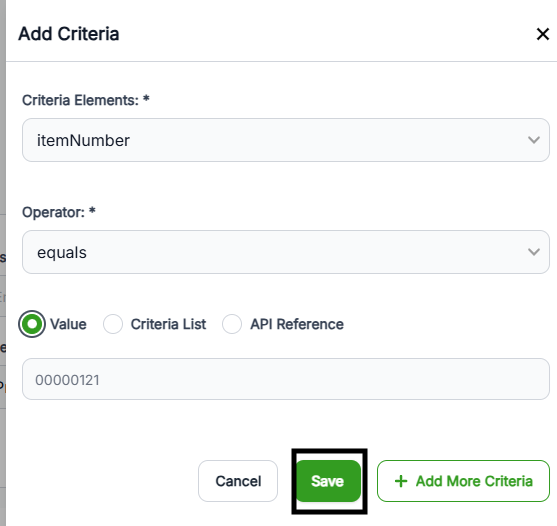
1. Click + Add criteria

2. Fill out the following fields on the Add Criteria form:
3. Click Add Criteria
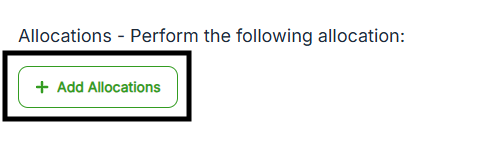
Add the Allocations
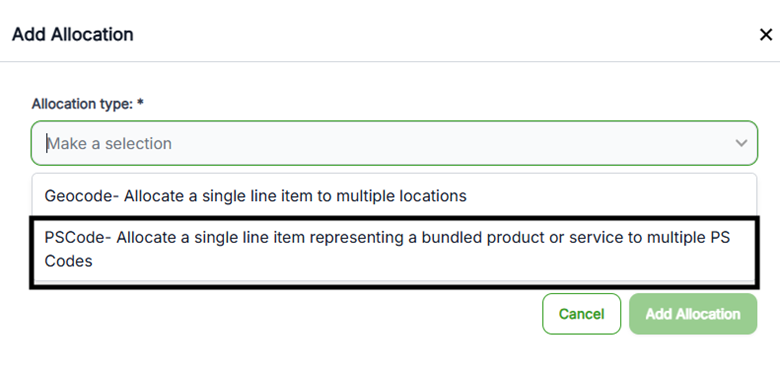
1. Click + Add allocation
2. Select PSCode from the allocation type drop-down.
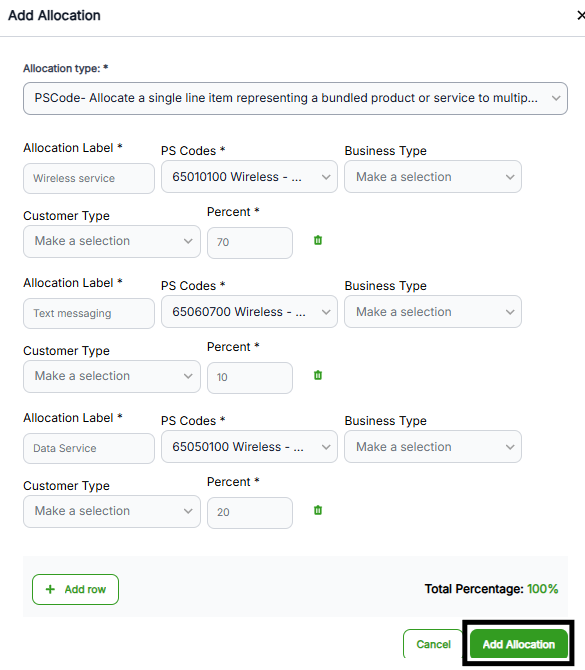
3. For each allocation row, complete the following:
The invoice-level Business Type and Customer Type setting can also be overridden in an allocation. To do so, select a Business Type and/or Customer value from the drop-down. By default, two allocation rows will be available. More allocation rows can be added by selecting + Add row.
4. Select Add Allocation to save the allocation details. An allocation can be saved once all rows add up to100%.
Save the Rule
1. Once returned to the Create Rule screen, click Create Rule.