Install & Setup

To use the CereTax for Stripe integration, you must have an active Stripe account. If you do not have one you can sign up for one via https://stripe.com/.

Set up and Configuration Guide

Step 1: Connecting Stripe to CereTax

  1. Click here to launch the CereTax for Stripe Billing app to connect your Stripe Sandbox.
    1. To connect a Stripe Production please work with your Implementation Consultant.
  1. Click Connect with stripe

    1. If you have multiple Stripe accounts or sandboxes, you will be prompted to select an account or sandbox to sign into.
    2. If you are not currently logged into Stripe, you will be prompted to enter your Stripe login.
  2. Enter the license key provided by your CereTax implementation contact.
    1. If connecting to your CereTax Sandbox (CERT) account, enter your sandbox license key
    2. If connecting your CereTax Production account, enter your production license key
  3. Click Validate Credentials to establish a connection to your CereTax account
  4. Successfully validating your credentials will create the CereTax for Stripe Webhook.  You’ll need copy this for Step 2: Configure Stripe Events.

Refine Your CereTax for Stripe Settings:

Integration Settings

Use these options to configure the integration behavior.

Tax Settings:
  • Enable Tax Calculation: Enable or disable tax calculations from CeraTax.
  • Tax Inclusive Items: Toggle this if item prices include tax.
  • Detailed View of Tax: Enable to get detailed tax breakdowns line-by-line.
Tax Behavior Settings:
  • Default PS Code: Select the default Product/Service code used in tax determination.
  • Profile: Choose a profile that will be used to send transactions to.
  • Customer Type: Choose the type of customer (e.g., individual, reseller, government).
  • Business Type: Choose the business category for tax classification.

Address Validation

Address Fields

  • Street: Enter the street address.
  • Apartment, Unit, or Other: Additional address information.
  • City: Enter the city.
  • State: Select the applicable state.
  • Country: Select the country (defaults to United States).
  • Zip Code: Enter the zip/postal code.

Actions

  • Validate Address: Click to verify the entered address against the validation service.

Save Configuration

After all the fields and preferences have been set, click the Save button (bottom-right corner) to apply and persist your settings.

Step 2: Configure Stripe Events

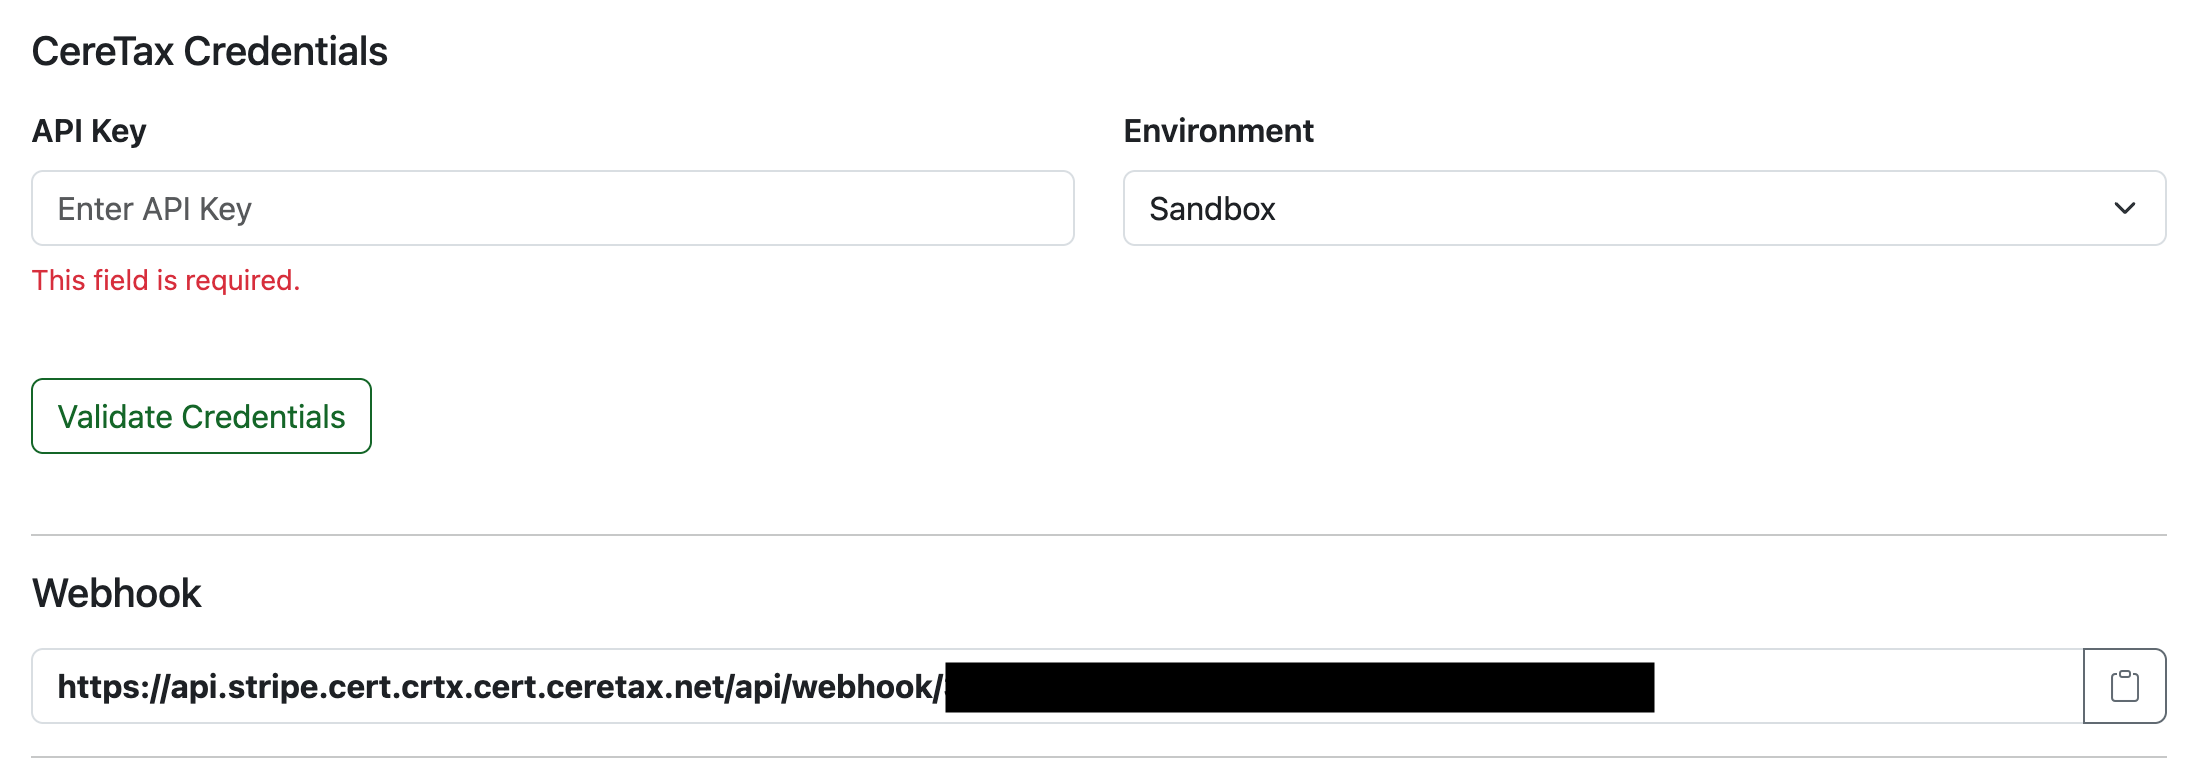
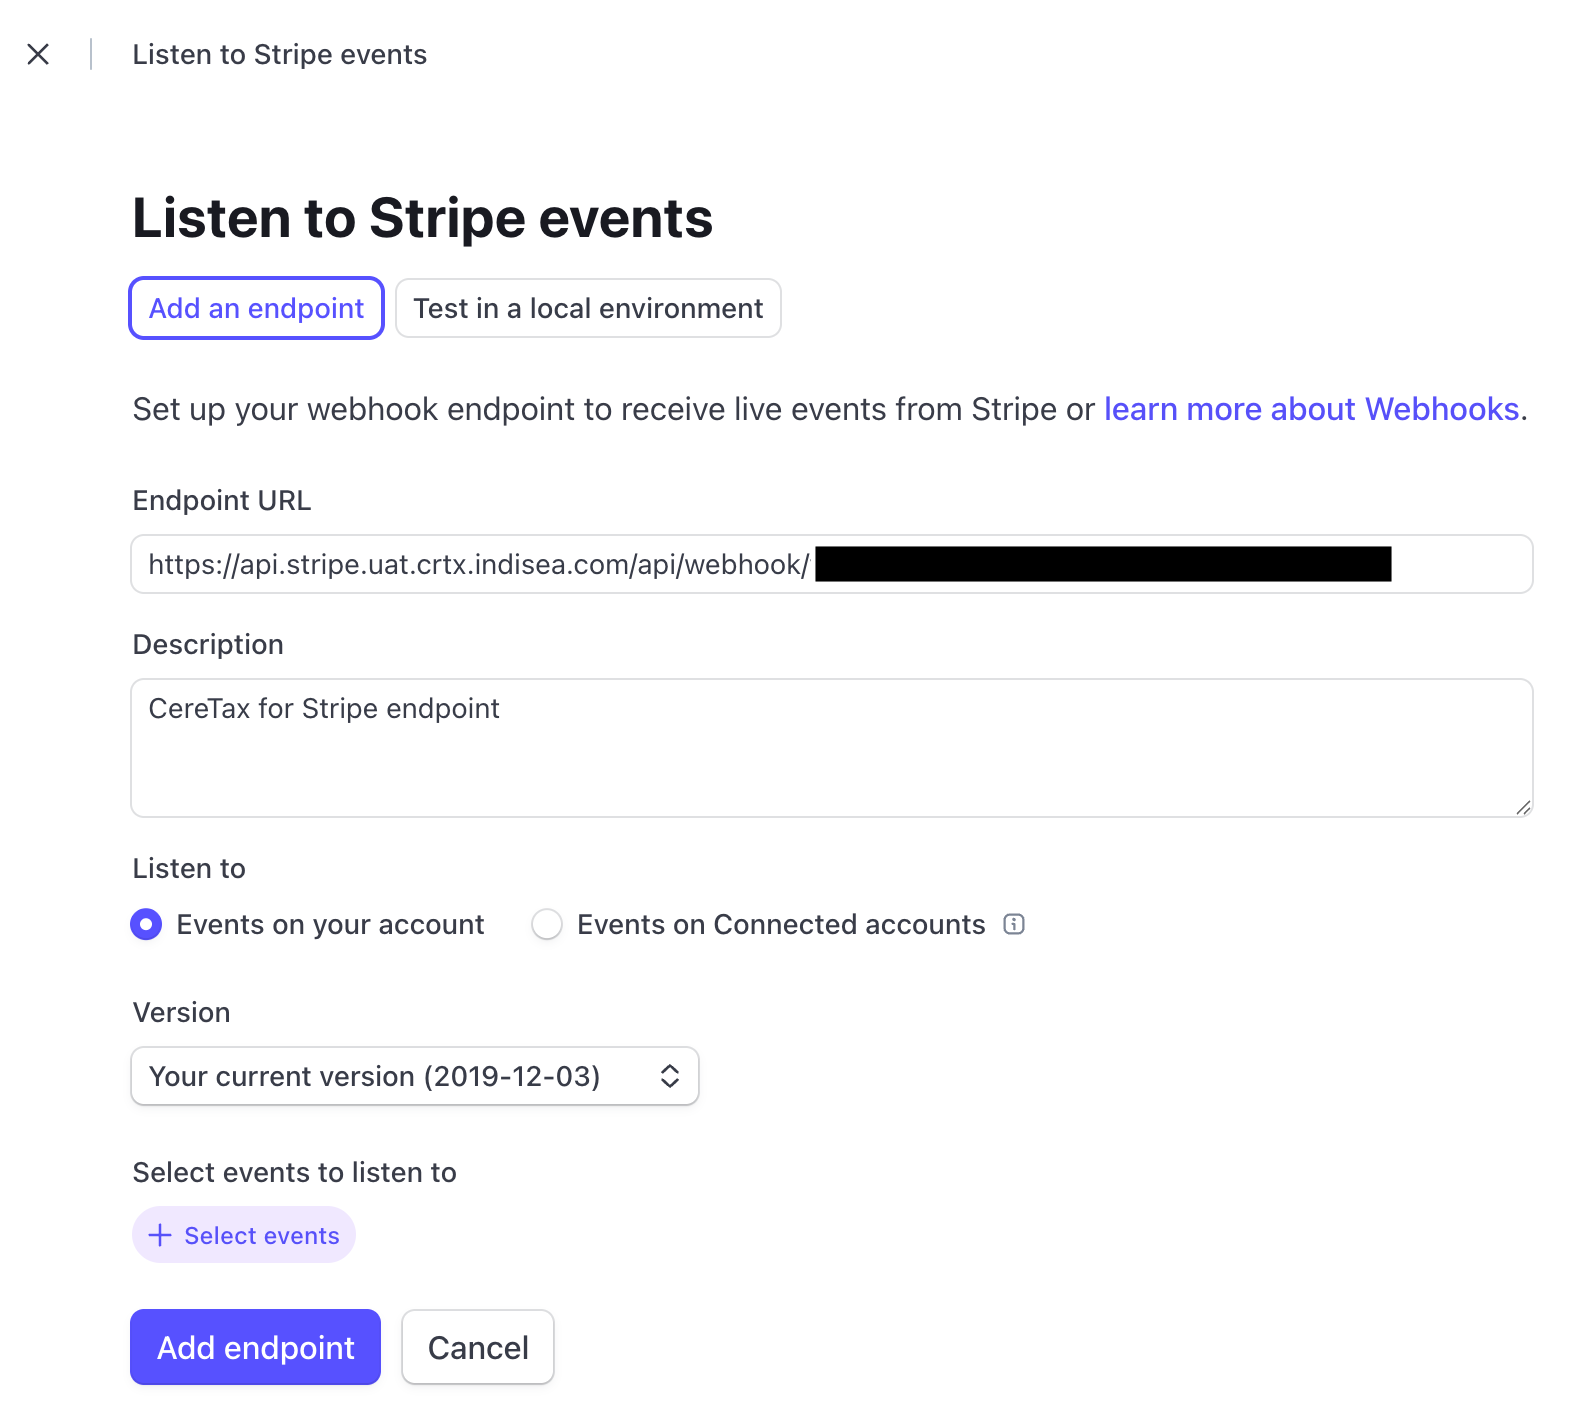
Once you have established a connection to the CereTax platform, you will need to set up the right configuration events.  To do this, you will want:

  1. Copy the Webhook URL from the CereTax for Stripe configuration page
  2. Go to your Stripe Dashboard
  3. In the search bar search for Webhooks
  4. Select the Create a webhook result
    1. For more information please visit: https://docs.stripe.com/development/dashboard/webhooks
  5. Click + Add endpoint
  6. Paste the Webhook URL from the CereTax for Stripe configuration that you copied into the Endpoint URL field
  1. Click Select Events and add the following events:
    1. Customer events
      1. customer.created
      2. customer.updated
    2. Invoice events
      1. invoice.created
      2. invoice.finalized
      3. invoice.updated
  2. Once all events have been added, click Add endpoint
  3. Your CereTax for Stripe integration has now been configured to calculate tax.

User Guide

Exemptions

CereTax Stripe Connector allows you to handle tax-exemption at Customer Level Exemption and single Line-item level Exemptions.

Customer Exemptions

To mark a customer as tax exempt, set their Tax Status to “Exempt” in Stripe. This allows CereTax to recognize the customer as eligible for tax exemption.

When user creates a transaction with this customer, Connector will send default PS code ‘10010200’ on all lines items to mark transaction as exempted and tax details are added in Invoice.

Line-Level Exemptions and Non-Taxable Items

CereTax Stripe Connector allows you to handle tax-exemption at single Line-item level Exemptions.

  1. Pass Tax Exempted in Metadata per Item at Product Pricing section
  2. The key " IsTaxExempted" must be set to "true" as a string in metadata in the Product Pricing section.

When user creates a transaction with line level item exemption, the Connector will send default PS code ‘10010200’ on that line item to mark line as exempted and tax details are added in Invoice.

Tax Inclusive Items

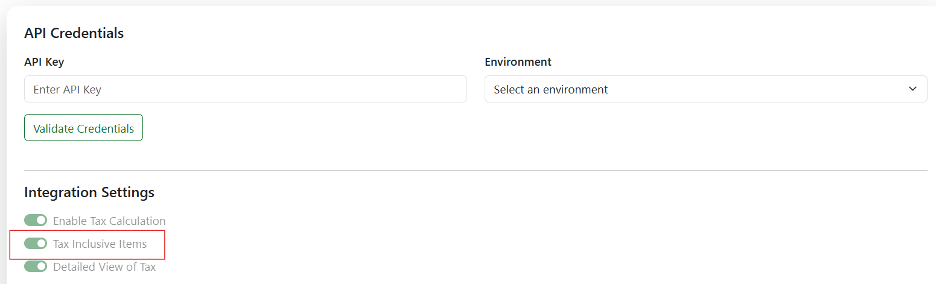
CeraTax allows you to handle tax-inclusive pricing, where the price of an item already includes the applicable taxes. This ensures that tax calculations are correctly applied without inflating the total amount charged to the customer.

When a user creates a transaction with tax-inclusive pricing, all line items on the invoice must be tax-inclusive. If any line item is marked as tax-inclusive, the connector will automatically mark all line items as tax-inclusive.

Why this is required: CereTax supports tax-inclusive settings at the line-item level, whereas Stripe applies tax-inclusive or exclusive settings at the invoice (header) level only. Since Stripe does not support mixed tax modes within the same invoice, the connector enforces a consistent tax-inclusive setting across all line items to ensure compatibility.

Step 1: Enable Tax Inclusive in Connector Settings

  1. Go to CeraTax Settings.
  2. Under Integration Settings, enable the toggle for: Tax Inclusive Items
  3. Click Save to apply the changes.

This setting tells CeraTax to treat the item prices as tax-inclusive during tax calculation.

Step 2: Pass Tax Inclusive Metadata per Item at Product Pricing section

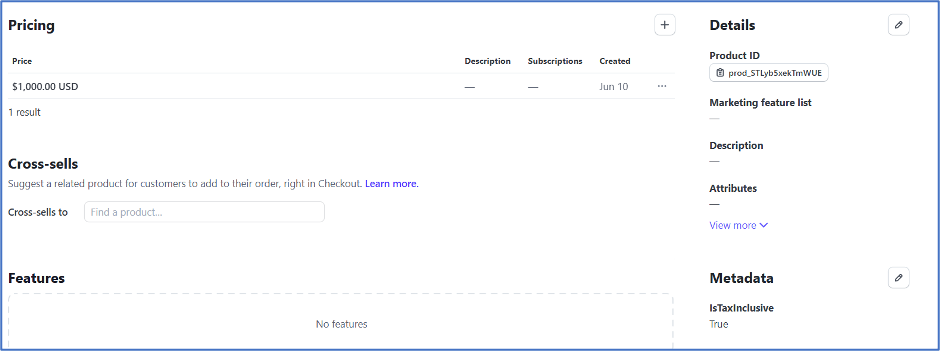
In addition to enabling setting in CereTax, the key "IsTaxInclusive" must be set to "true" as a string in metadata in the Product Pricing section.

  1. Go to Product catalog in Stripe
  2. Click on the product you want to edit or click Create new product.
  3. Under the Metadata section click the pencil icon to edit
  4. Enter IsTaxInclusive in the Key and enter true in the Value field.
  5. Click Save

Tax Details

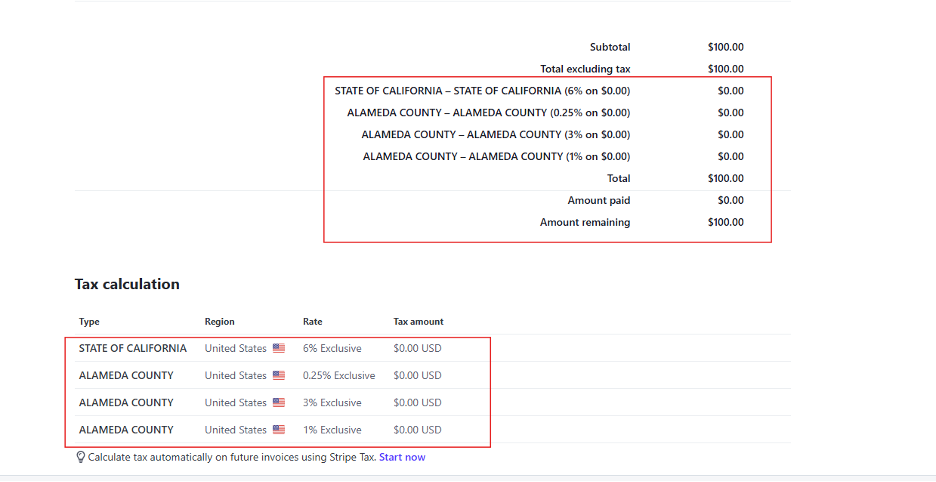
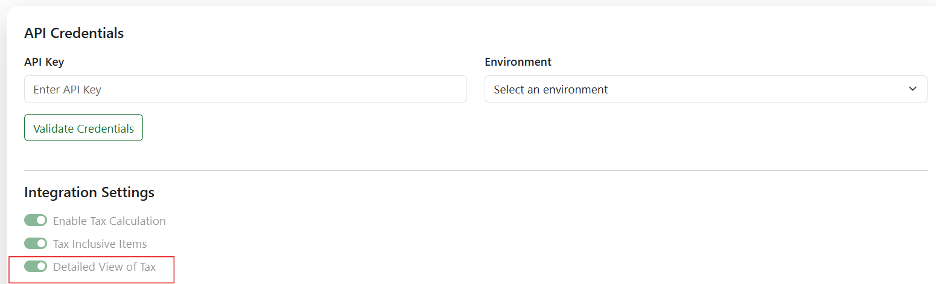
CeraTax allows you to see tax details added in Invoice when calculation is done.

Go to CeraTax Settings and Under Integration Settings, enable the toggle for Detailed view of Tax

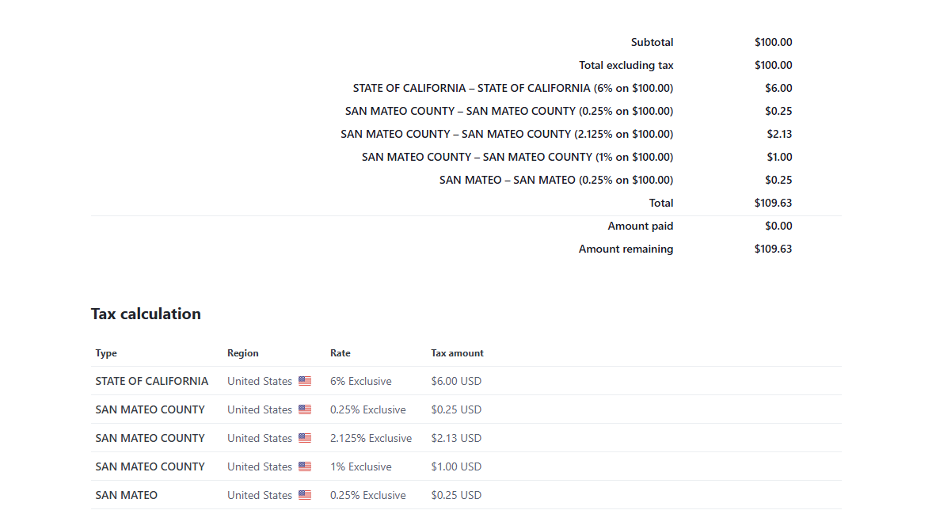
Once you enable the toggle and create any invoice, Tax details will be added in Invoice with tax jurisdiction details as below

How to Post finalized transactions to CereTax

Whenever an invoice is created, the connector sends this transaction to CereTax as ‘Quote’ in configuration.

Once invoice is finalized in Stripe, the connector sends this transaction to CereTax as ‘Posted’ in configuration, this Posts/record a transaction in CereTax for compliance, reporting, and future reference.

Address Validation

CereTax allows you to handle address validation on customer address. To perform address validation, we need to perform the steps below

  1. Enable Address validation option in Connector Address validation section.
  1. Whenever we add/update address on Customer card, this will trigger address validation call to CereTax

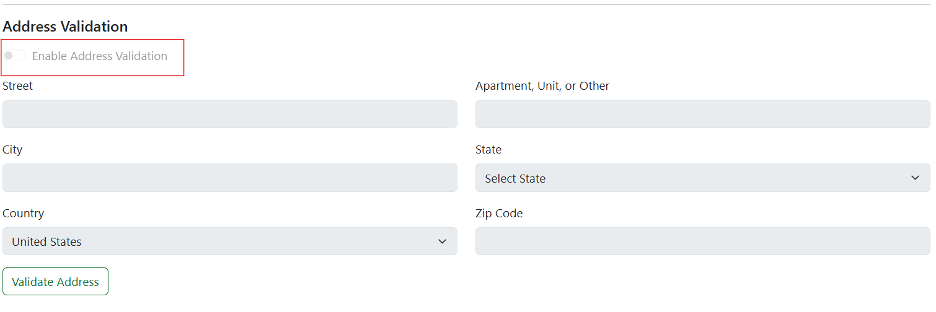
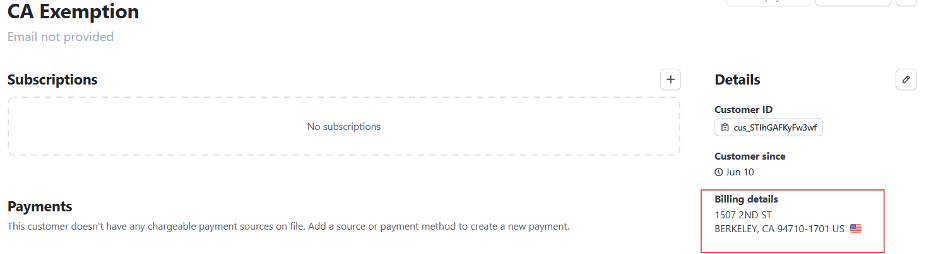
On success validated address will be updated in customer.

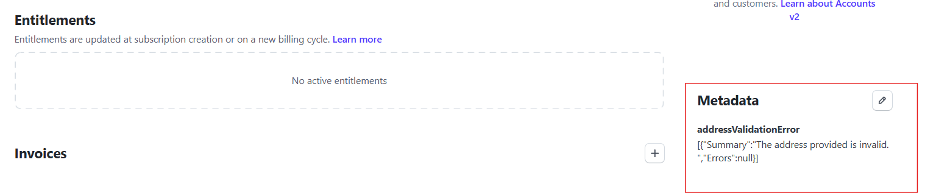
In the event an error occurs, the error will be added in the Customer metadata with an addressValidationError key and message.
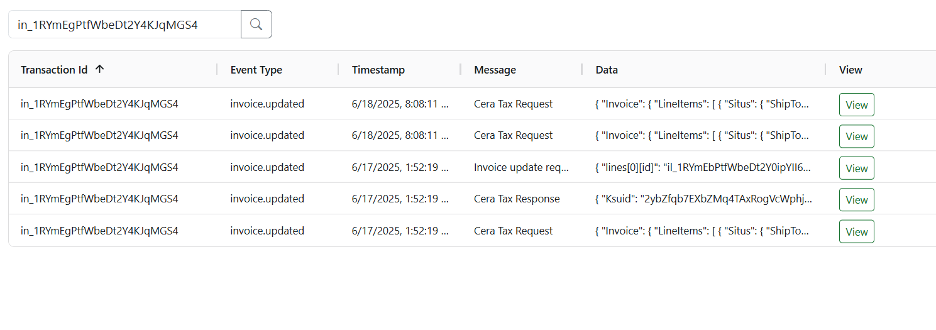
Logging

In CereTax Stripe connector we have added Logs in connector admin UI. To navigate to connector logs we need to login into CereTax Stripe connector admin UI and select the connector logs tab.

Connector logs will have CereTax Request, CereTax Response, Stripe Invoice Update Request and Error messages which occur during CereTax calls. Users can filter logs based on transaction id (Invoice Id from Stripe).