Rillet Install & Setup

Rillet - Install & Setup

Before You Begin

Gather the following before starting. You will need all four to complete setup:

Item Where it comes from
Rillet API key You create it in Step 1
CereTax API key Provided by CereTax
CereTax Portal credentials Provided by CereTax
CereTax webhook URL Displayed on the connector configuration page in Step 2

Step 1 — Create a Rillet API Key

  1. In Rillet, click your account name in the lower-left corner of the page.
  2. Select Organization Settings from the pop-up menu.
  3. Go to API Access.
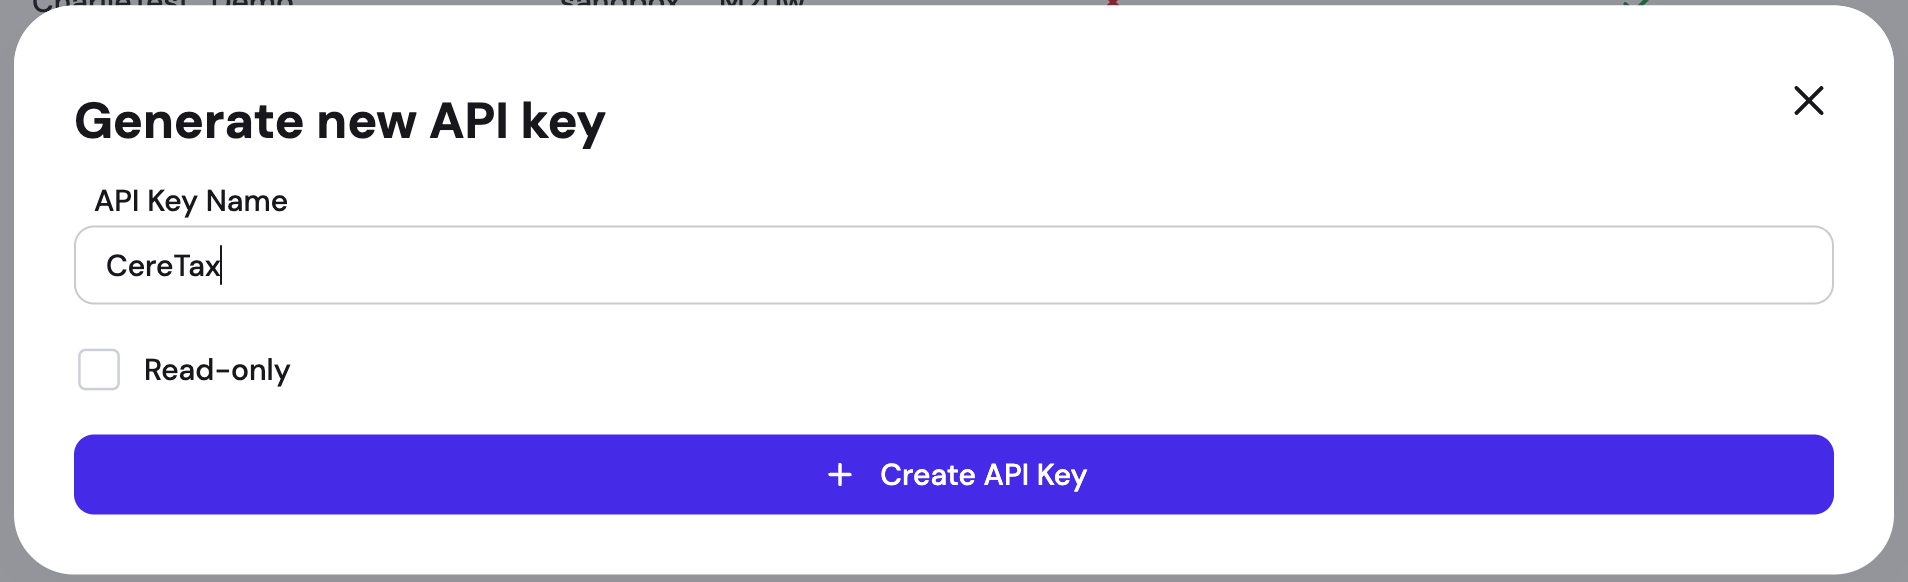
  4. Click Create New.
  5. Copy the key and keep it available — you will paste it in Step 2.

Do not select the read-only checkbox when creating the key. The connector must be able to write tax lines back to Rillet.

Step 2 — Configure the CereTax Connector

2.1 Log in

  1. Open the connector configuration page:
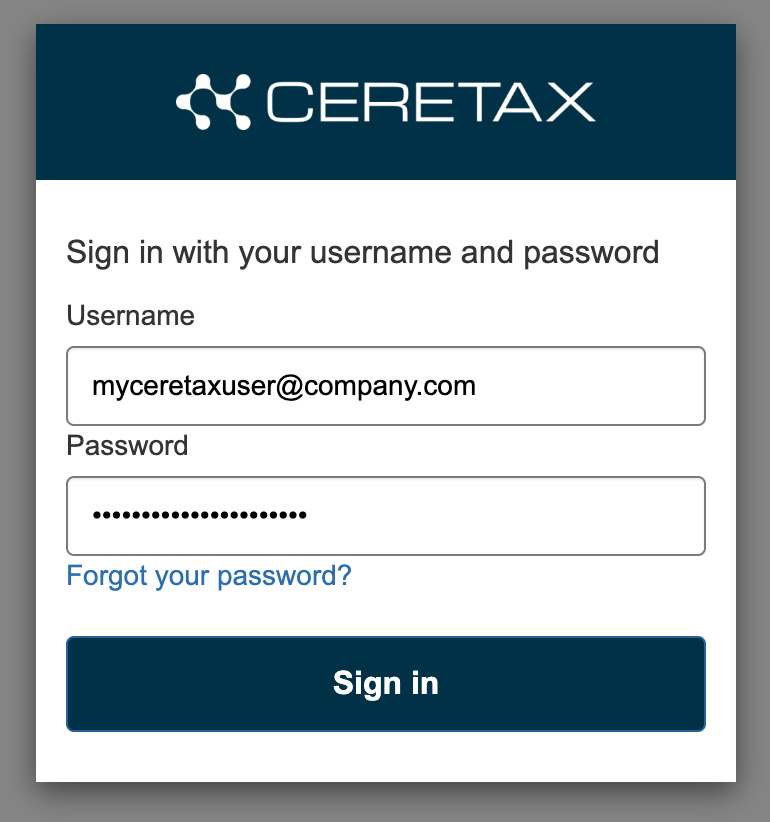
  2. Enter your CereTax Portal credentials and click Continue. You land on the connector configuration page.

2.2 CereTax credentials

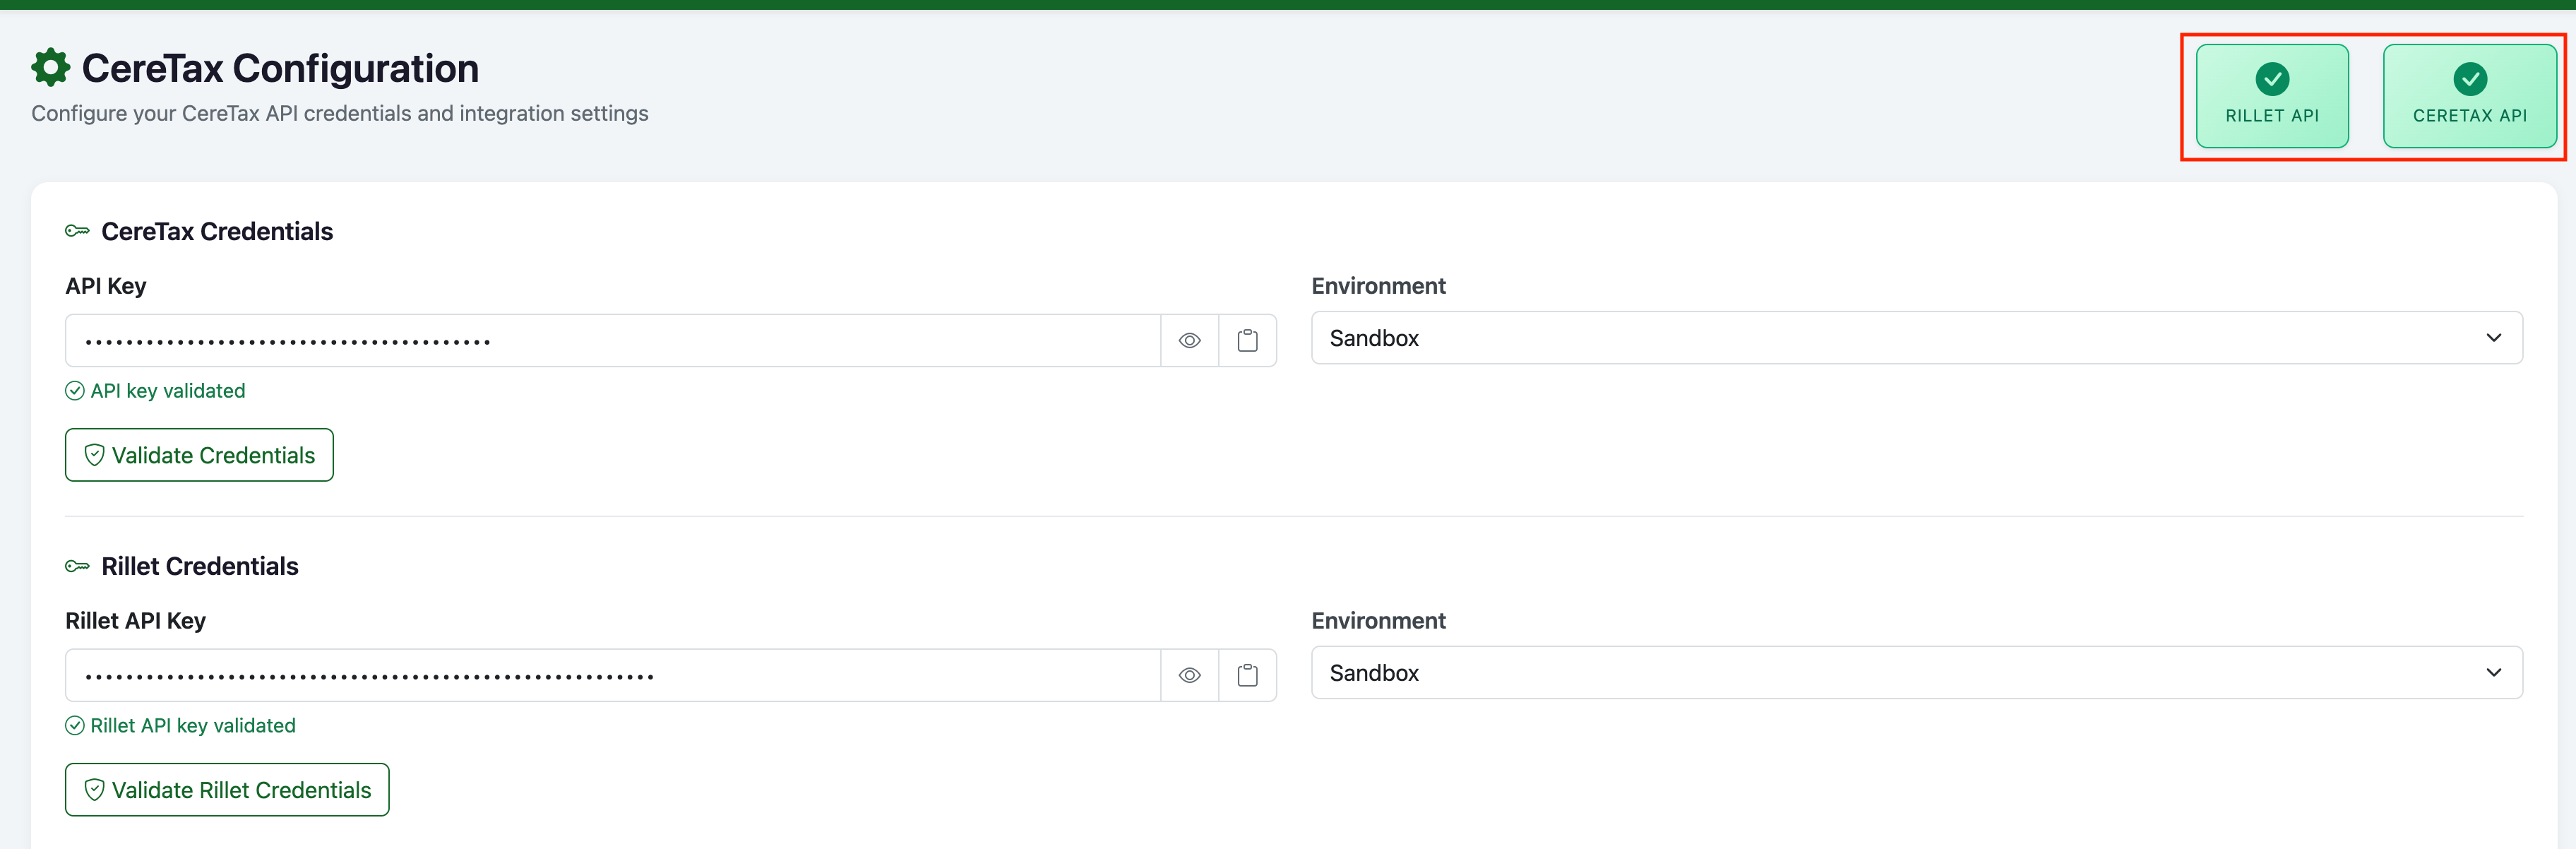
  1. Under CereTax Credentials, enter your CereTax API key.
  2. Select the Environment the connector should operate in — Sandbox for testing and validation, Production for live transactions.
  3. Click Validate Credentials. A green tick in the upper-right corner confirms the key is valid.

The configuration cannot be saved without a valid CereTax API key.

2.3 Rillet credentials

  1. Under Rillet Credentials, enter the Rillet API key you created in Step 1.
  2. Select the matching Rillet environment (Sandbox or Production).
  3. Click Validate Credentials. A green tick in the upper-right corner confirms the key is valid.

2.4 Integrations Settings

Setting What it does
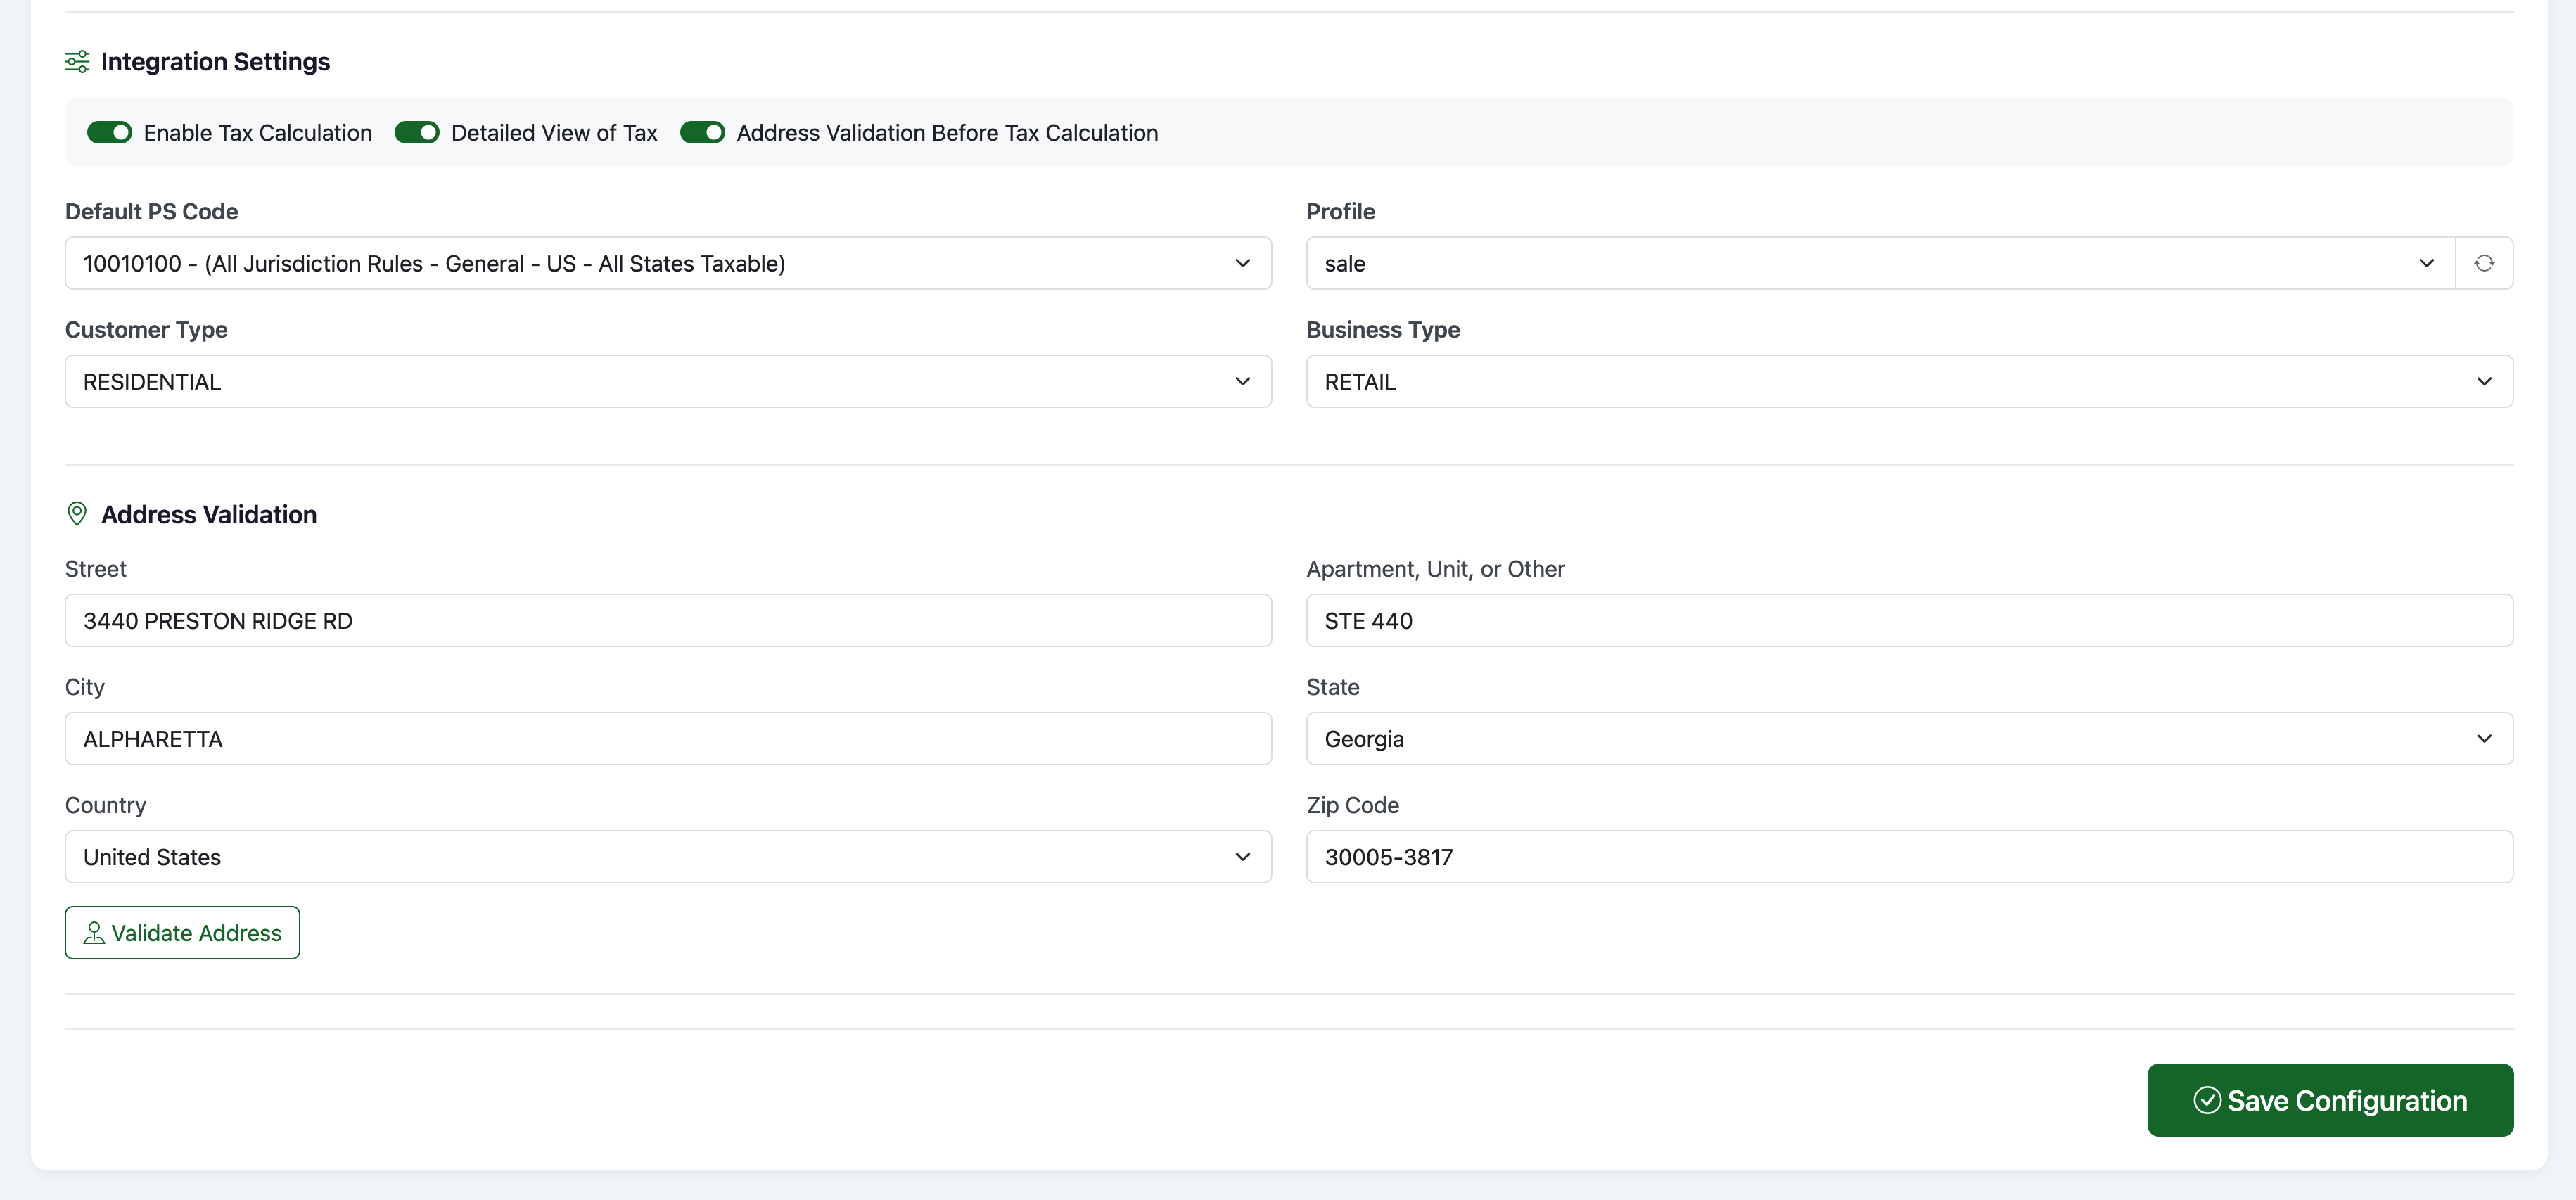
Enable Tax Calculation CereTax calculates sales tax in real time for Rillet transactions.
Detailed View of Tax Detailed tax breakdowns (jurisdiction-level taxes) are calculated and returned to the invoice.
Address Validation Before Tax Calculations The connector sends the address-validation-before-tax flag as true.

2.5 Default tax settings

These values apply whenever a transaction does not specify its own.

Setting What it does
Default PS Code The Product/Service tax code applied when no tax code is mapped at the item level.
Profile The CereTax profile associated with your company. Profiles define jurisdiction rules and tax behavior.
Customer Type Default customer classification used for tax calculation (e.g., Residential, Commercial).
Business Type The nature of your business (e.g., Retail, Wholesale).

2.6 Default ship-from address

Enter the address your goods or services ship from:

  • Street
  • Apartment / Unit (optional)
  • City
  • State
  • Zip Code
  • Country

Click Validate Address to verify the address against CereTax's address validation service.

2.7 Save and copy the webhook URL

  1. Click Save to store all connector settings. The connector applies them immediately.
  2. Find the Webhook URL on this page and copy it. You will paste it into Rillet in Step 3.

Step 3 — Create the Rillet Webhook

The webhook is what tells CereTax an invoice needs tax. Without it, nothing calculates.

  1. In Rillet, navigate to Organization Settings.
  2. Go to Webhooks.
    • Production: https://app.rillet.io/settings/webhooks
    • Sandbox: https://sandbox.rillet.io/settings/webhooks
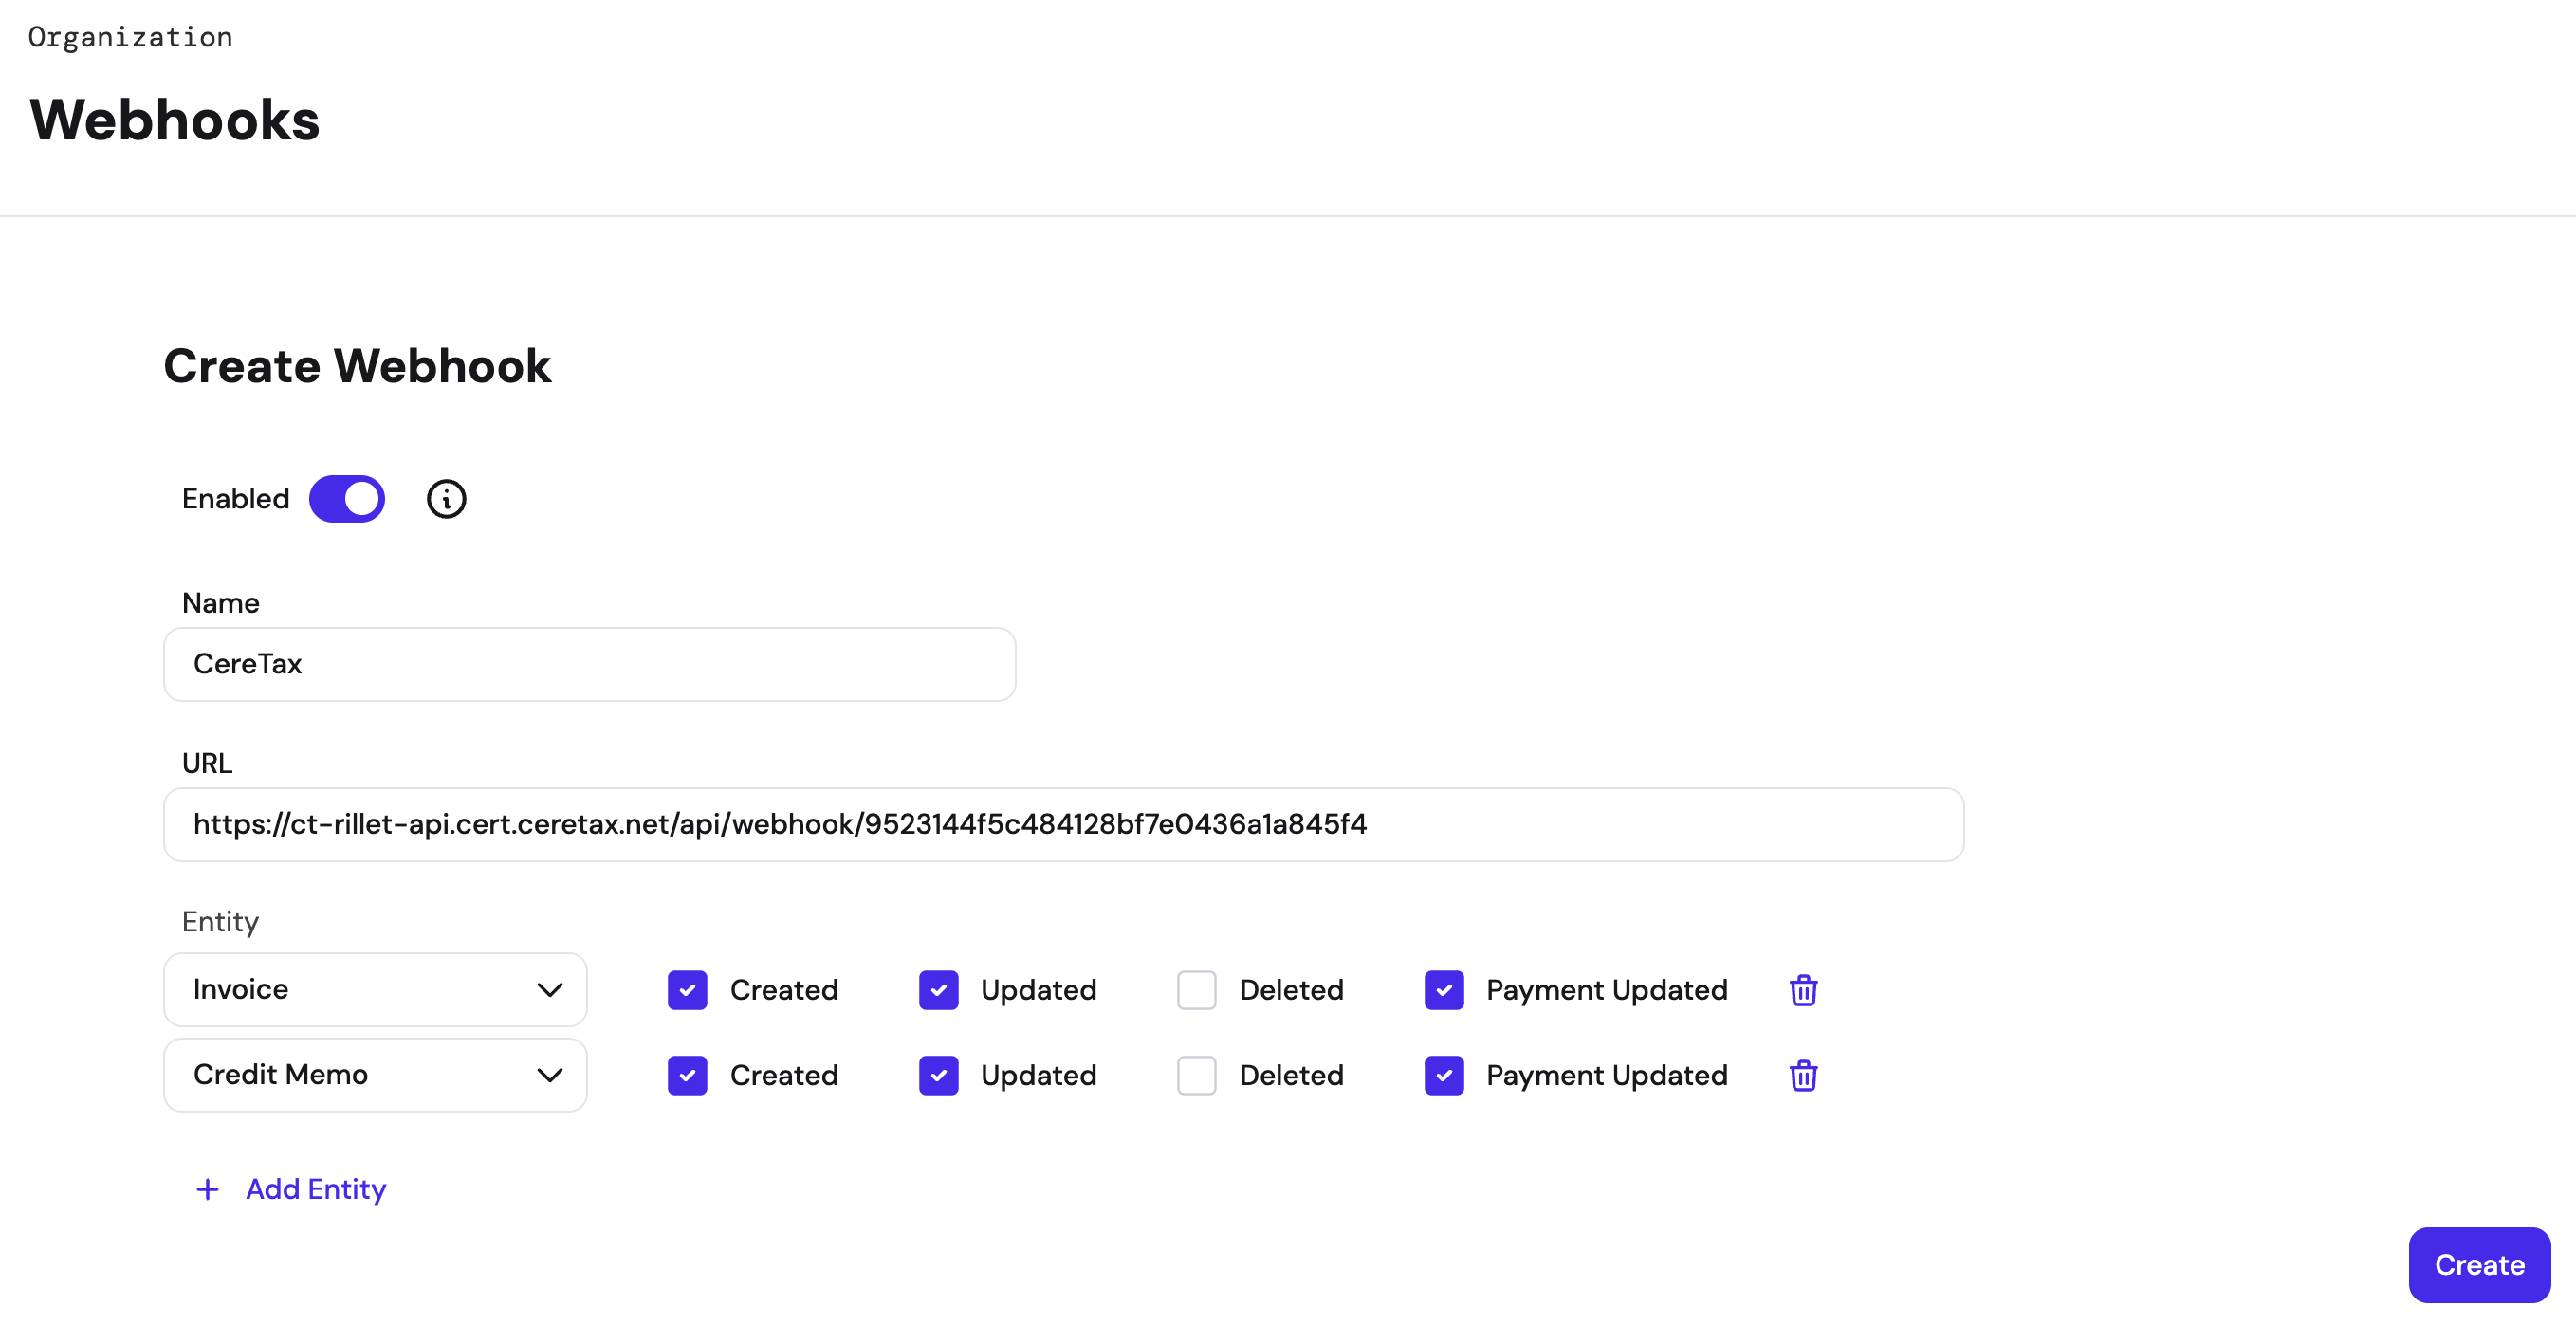
  3. Click Create Webhook.
  4. Name it CereTax Connector.
  5. Paste the Webhook URL you copied in Step 2.7.
  6. For Entity, select Invoice and Credit Memo.
  7. For both entities, check Created, Updated, and Payment Updated.
  8. Click Create.

Setup is now complete. The remaining sections cover product mapping and day-to-day use.

Using the Connector

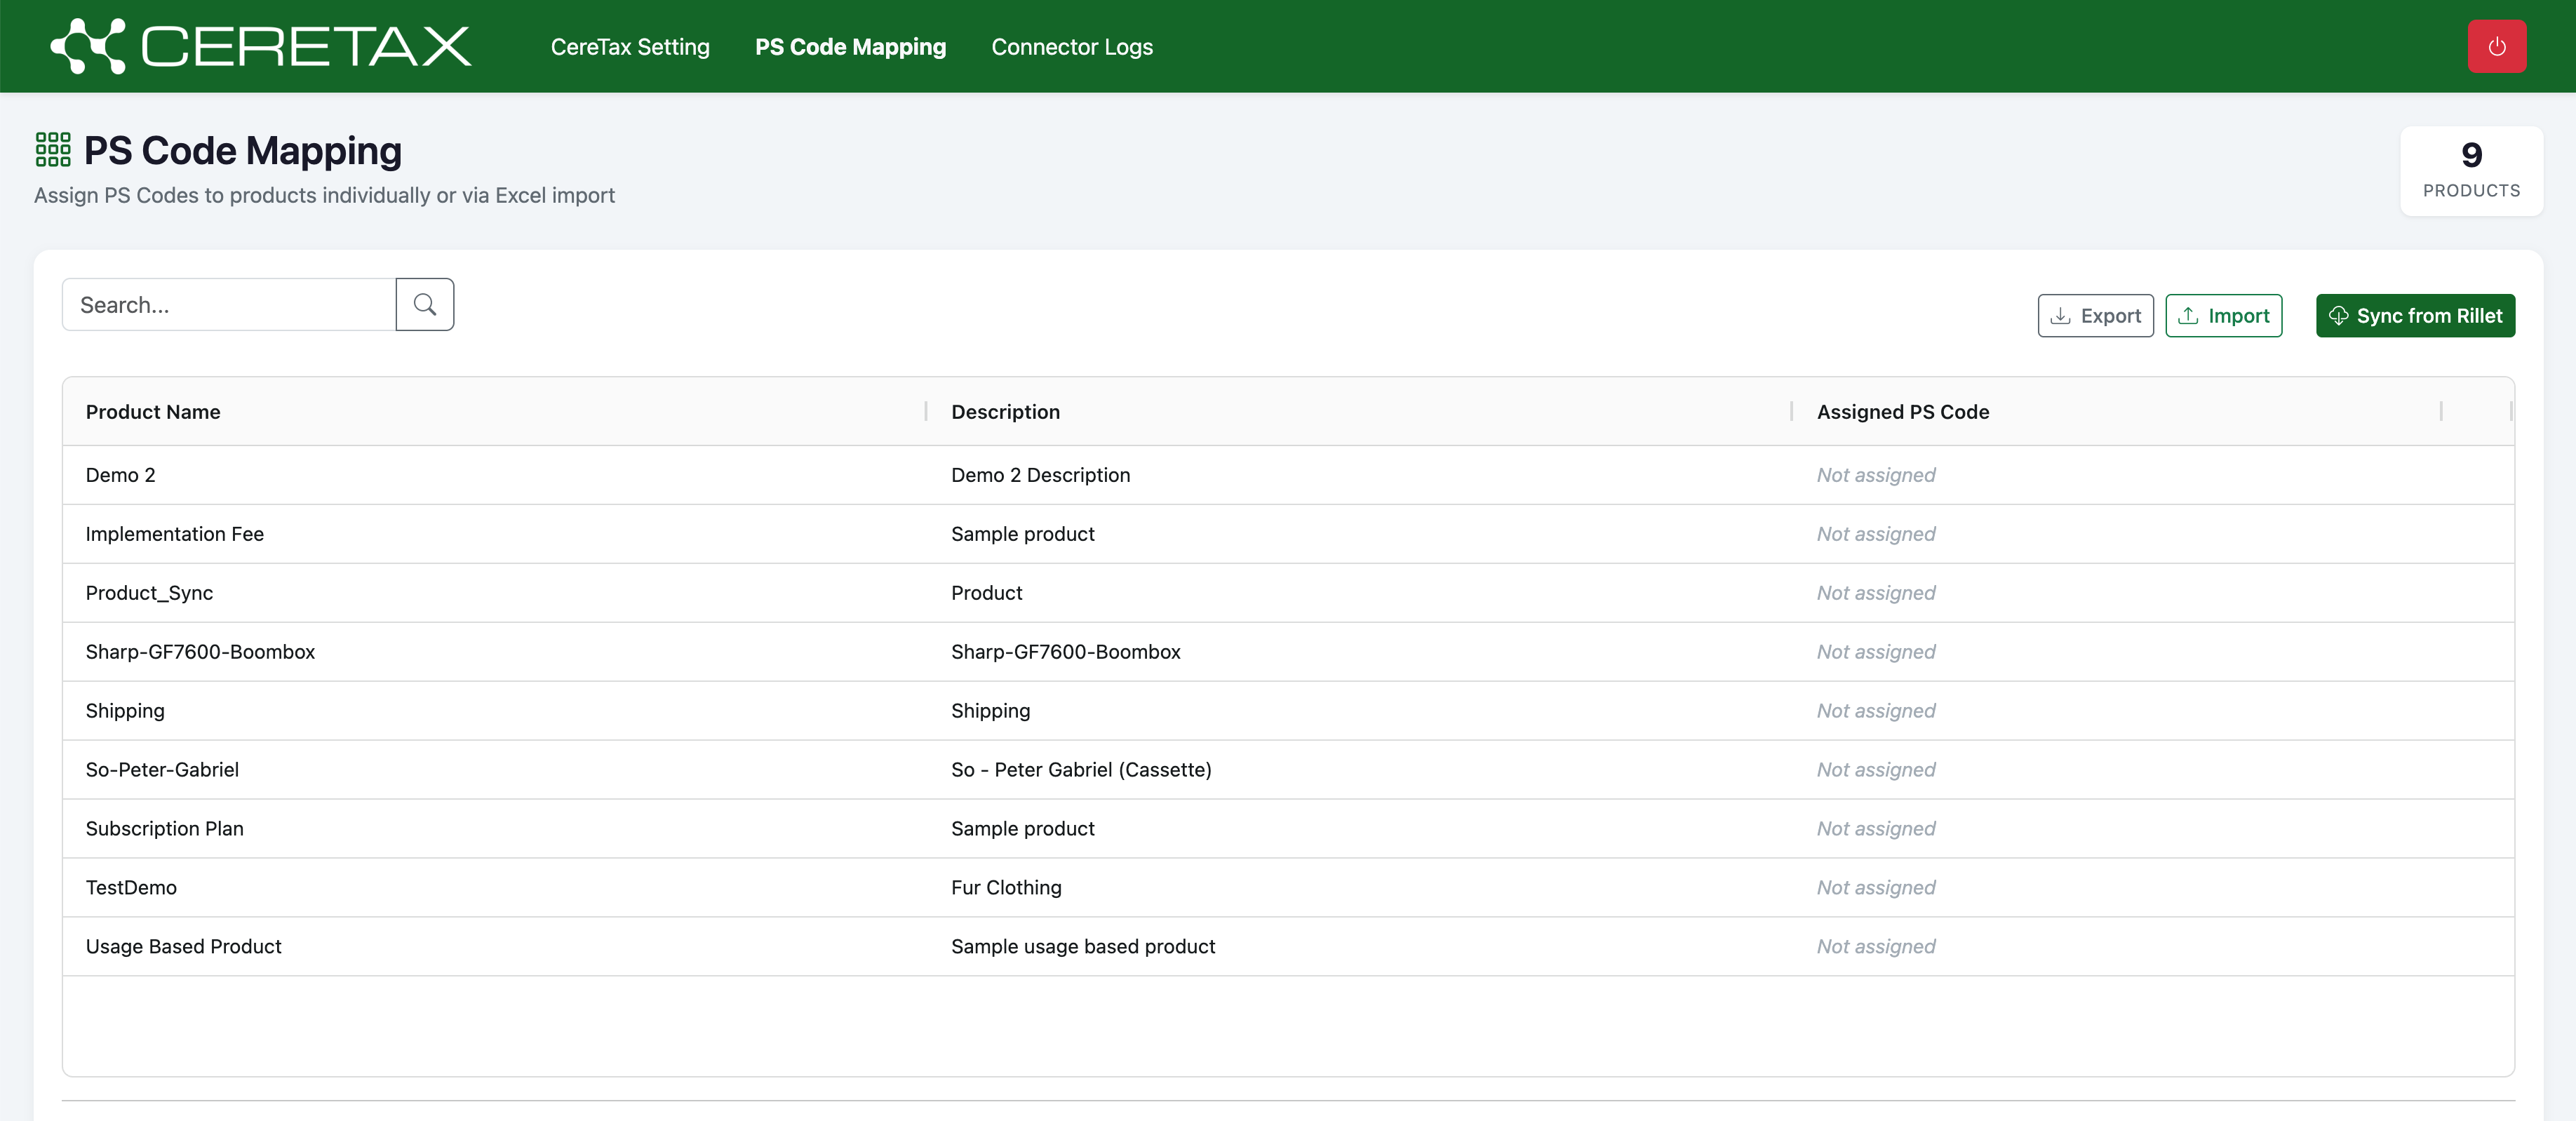
Map Your Products to PS Codes

Tax accuracy depends on mapping your items to CereTax Product/Service (PS) Codes. Anything left unmapped falls back to the Default PS Code from Step 2.5.

Sync items from Rillet

The Sync from Rillet button allows you to import any items added to Rillet so that you do not have to manually import them.

Map individual items

  1. For the item you want to map, click the Assigned PS Code dropdown.
  2. Select the CereTax PS Code to map.
  3. Click Save.

Map in bulk

  1. Click Export.
  2. Open the downloaded .xlsx file.
  3. Enter PS Codes in column D. Do not edit columns A, B, or C.
  4. Save the file locally.
  5. Back in the connector, click Import.
  6. Review the results — the connector reports any PS Codes that were invalid or failed to map. Resolve those before saving.

How transactions post to CereTax

  1. Invoice created in Rillet → the connector sends the transaction to CereTax as a Quote.
  2. Invoice paid in Rillet → the connector sends the transaction to CereTax as Posted, recording it for compliance, reporting, and future reference.

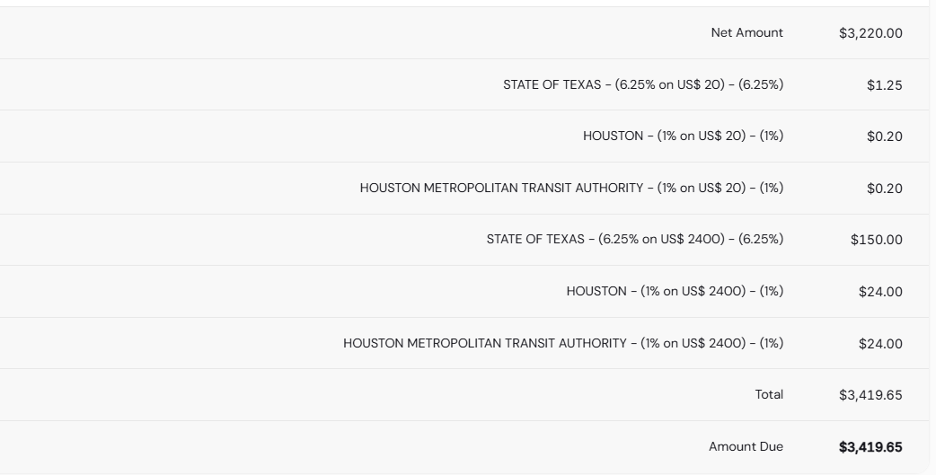
Viewing tax details on an invoice

  1. Go to CereTax Settings → Integration Settings.
  2. Enable Detailed View of Tax.

Any invoice created after the toggle is enabled will show tax details with jurisdiction-level breakdown.

Troubleshooting

Symptom Likely cause
Configuration will not save CereTax API key not validated — click Validate Credentials first (Step 2.2).
Invoices are not being taxed Webhook missing or missing event types — confirm Created, Updated, and Payment Updated are checked for both Invoice and Credit Memo (Step 3).
Tax lines are not written back to Rillet Rillet API key was created read-only — regenerate it with the read-only box unchecked (Step 1).
Wrong tax on specific items Item is unmapped and using the Default PS Code — map it in Step 4.
No jurisdiction detail on invoices Detailed View of Tax is off, or the invoice predates enabling it.