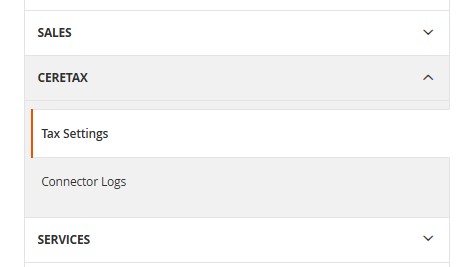
After installation, a new CereTax tab appears in the left-hand navigation of the Adobe Commerce Admin configuration area.
Navigation path: Stores → Configuration → CereTax
Under this tab you will find two sections:
Section
What It Contains
Tax Settings
API credentials, tax calculation toggles, address validation, and all connector settings.
Connector Logs
A searchable log viewer showing every API request and response the extension has made.
[Figure 1 — CereTax tab in the Admin Configuration panel]
4. Initial Tax Configuration
Tax settings must be configured before the extension can calculate taxes. Without a valid API key and the required settings in place, the extension will not send any requests to CereTax and no tax will be applied at checkout.
Why is configuration required?
The extension connects to the CereTax cloud service to calculate taxes in real time. It needs your API key to authenticate, and it needs to know which environment, customer type, business type, and tax profile to use so that calculations are accurate for your business.
To begin configuration:
Log in to the Adobe Commerce Admin.
Navigate to Stores → Configuration.
In the left panel, click the CereTax tab.
Click Tax Settings.
5. API Key Setup & Validation
The API key links your store to your CereTax account. This is the first field you need to configure.
Step-by-step
On the Tax Settings page, locate the API Key field.
Paste your CereTax API key into the field. The key is stored in encrypted form for security.
Select the Environment:
Sandbox — for testing and development. Connects to CereTax test servers.
Production — for your live store. Connects to CereTax production servers.
Click the Validate API Key button.
What happens after validation
The extension contacts CereTax to verify your key.
If validation succeeds, the remaining configuration dropdowns are automatically populated with data from your CereTax account (customer types, business types, seller types, profiles, PS codes, and shipping methods).
If validation fails, an error message is displayed. Double-check your API key and environment selection, then try again.
Tip: You must validate your API key before you can configure the remaining settings. The dropdowns depend on data that is synced from your CereTax account during validation.
[Figure 2 — API key validation and configuration fields]
6. Configuration Settings
After a successful API key validation, the following settings become available. All settings are configured on the same Tax Settings page.
Setting
Description
Enable / Disable Tax Calculation
Master on/off switch for the extension. Set to Yes to activate tax calculation, or No to disable it. When disabled, the extension will not make any API calls and Magento’s default tax behavior applies.
Environment
Choose Sandbox for testing or Production for your live store.
Customer Type
The default customer classification sent with every tax request (e.g., Retail, Wholesale). Options are pulled from your CereTax account.
Business Type
The type of business transaction. Options are pulled from your CereTax account.
Seller Type
Identifies your business classification as a seller. Options are pulled from your CereTax account.
Tax Detail Level
Controls how tax is displayed to the customer. Simple shows a single total tax amount. Detailed breaks down tax by jurisdiction (state, county, city, district) so the customer can see exactly where each portion of tax applies.
Default PS Code
The fallback Product/Service code used when a product does not have its own PS code assigned. See the PSCode Setup section for details.
Profile
The CereTax tax profile to use for calculations. Profiles are configured in your CereTax account and synced during API key validation. Use the Refresh button next to the dropdown to re-sync the list if you have made changes in your CereTax account.
Shipping Method
Maps your store’s shipping charges to a CereTax shipping method so that shipping tax is calculated correctly.
Address Validation Before Tax
When set to Yes, the extension validates the customer’s shipping address through the CereTax address validation service before making a tax calculation request. This helps ensure accurate tax jurisdiction matching. When set to No (default), tax is calculated using the address as entered by the customer.
Enable Address Validation
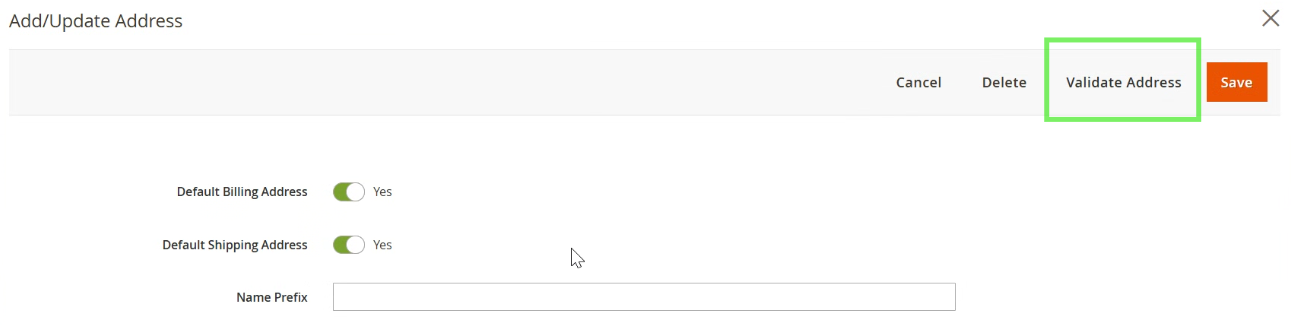
When set to Yes (default), a “Validate Address” button appears on customer address forms — both on the storefront (Customer Address Book) and in the Admin (Customer Edit page).
What the Validate Address button does
The customer (or admin user) fills in the address fields, then clicks Validate Address.
The extension sends the address to CereTax’s address validation service.
If the address is valid, the form fields are automatically updated with the standardized, corrected address (street, city, state, ZIP, and ZIP+4).
If the address cannot be validated, an error message is displayed and the original values remain.
[Figure 3 — Address Validation settings]
Saving Your Configuration
After configuring all settings, click the Save Config button at the top of the page.
7. PSCode Setup
What is a PSCode?
A PSCode (Product/Service Code) is a code that tells CereTax what type of product or service is being sold. CereTax uses this code to determine the correct tax rate and rules for each item. For example, clothing, food, and software may each have different tax treatments depending on the jurisdiction.
Why PSCodes are required
Without a PSCode, CereTax cannot determine the tax category of a product. Every line item in a tax calculation request must include a PSCode. If a product does not have one assigned, the extension falls back to the Default PS Code you set in the configuration.
Where to configure PSCodes
PSCodes can be assigned in two places:
A. Per-product PSCode (Product Edit Page)
Navigate to Catalog → Products in the Admin.
Open any product for editing.
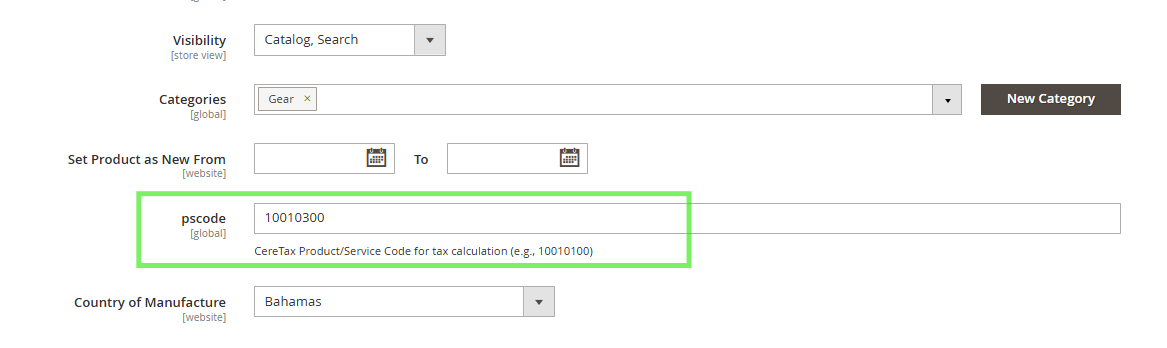
In the Product Details section, look for the PSCode field.
Enter the appropriate CereTax Product/Service code (e.g., 10010100).
Save the product.
The pscode attribute is created automatically when the extension is installed. It appears in the product grid and can be used to filter or search products.
[Figure 4 — PSCode field on the Product Edit page]
B. Default PSCode (Global Fallback)
Navigate to Stores → Configuration → CereTax → Tax Settings.
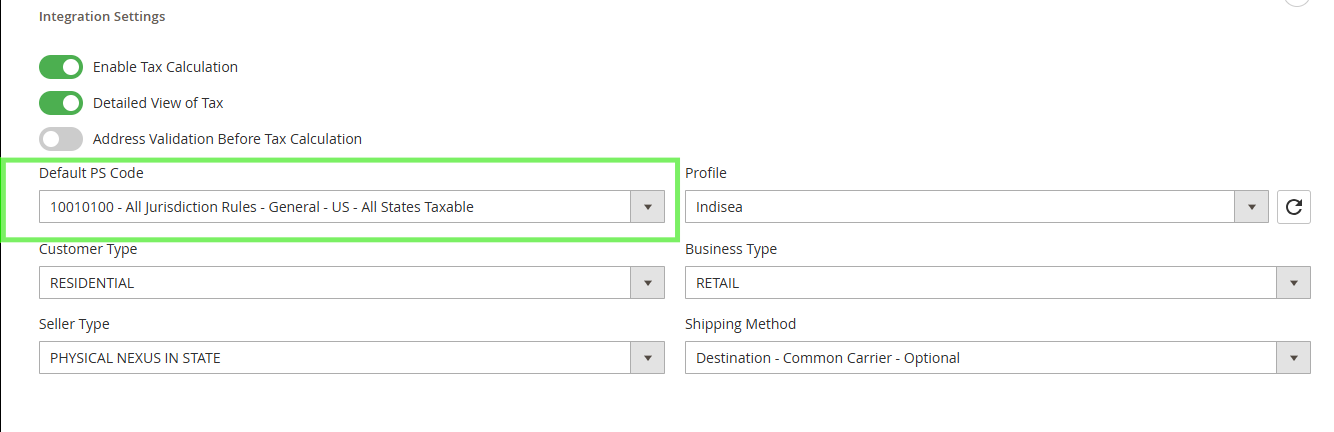
Select a value from the Default PS Code dropdown.
Save the configuration.
Any product that does not have its own PSCode will use this default value.
[Figure 5 — Default PS Code and configuration options]
How PSCodes are used during tax calculation
Priority
Source
Description
1
Product attribute
The pscode value assigned directly on the product.
2
Default PS Code
The fallback value from the configuration, used when a product has no code.
When an order is placed, the PSCode for each item is “frozen” — meaning it is saved with the order, invoice, and credit memo. This ensures that if you later change a product’s PSCode in the catalog, existing orders are not affected.
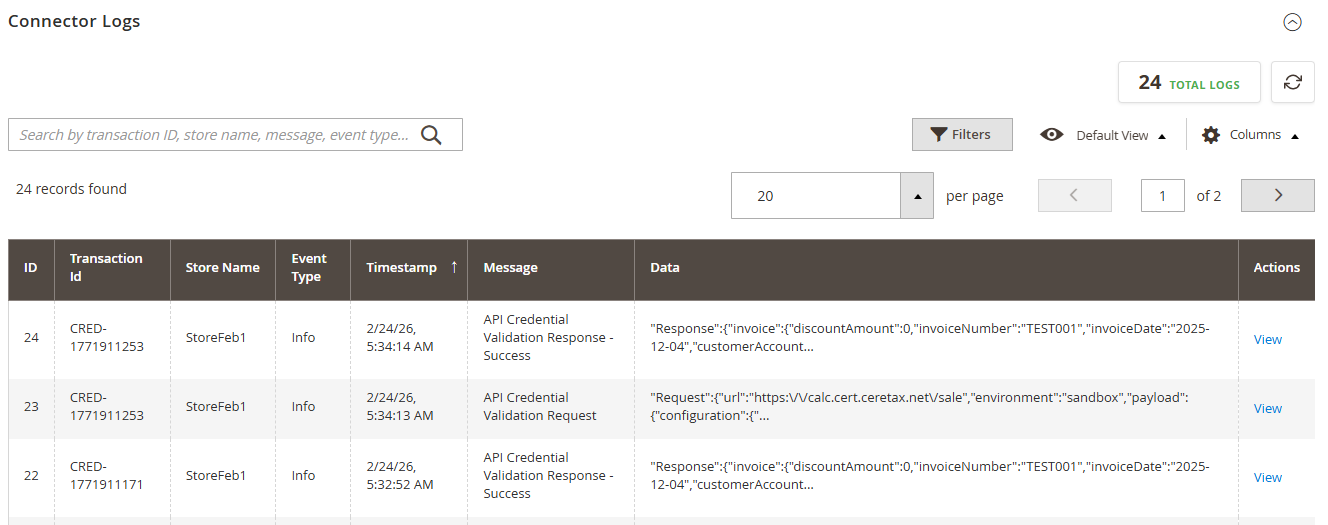
8. Logs & Debugging
The extension records every API interaction for troubleshooting and auditing purposes. Logs are stored in two locations.